This guide is to help replace a cracked or broken iPhone 5 screen. The steps are quite easy to follow and it is not too difficult to do, however Mobile repair Compare take no responsibility for any damage you may cause to your device and you use this guide at your own risk. If you are not 100% comfortable with repairing your device please seek advice from a professional you get a free instant quote from www.repairvillage.co.uk
When you buy a new screen assembly it does not come with LCD shield plate, home button, front camera or the earpiece speaker.

If your glass is badly broken to prevent small pieces of glass grazing or causing harm be sure to place tape over it.
Wearing safety goggles it advised.
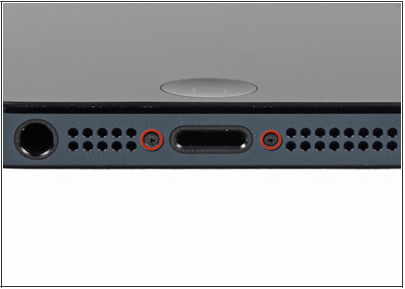
Always turn your phone off before taking it apart.
Take out the two screws from the bottom of your IPhone using a Pentalobe screw driver.
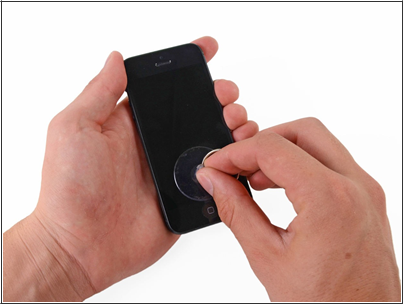
Using a suction cup place it onto the screen near the bottom but above the home button. A suction cup is usually provided with a new screen. If not you can pick one up from ebay.
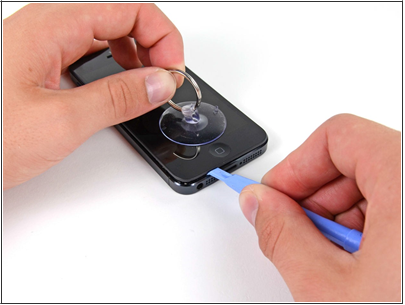
While holding the iPhone down with one hand, pull up on the suction cup to slightly separate the front panel assembly from the rear
Hold down the phone on the metal casing and pull the ring on the suction cup to separate the screen and rear case. Be sure to gently pull the screen while using a tool to pry it open, be careful when taking the screen off as there are several cables attaching the screen to the phone.
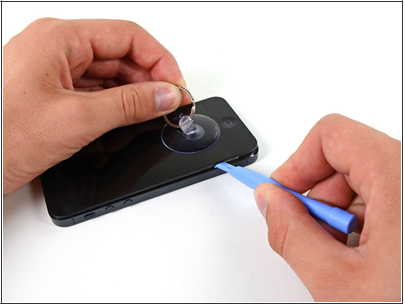
Using a plastic tool (usually supplied with screen) to gently separate the screen all the way around the phone.
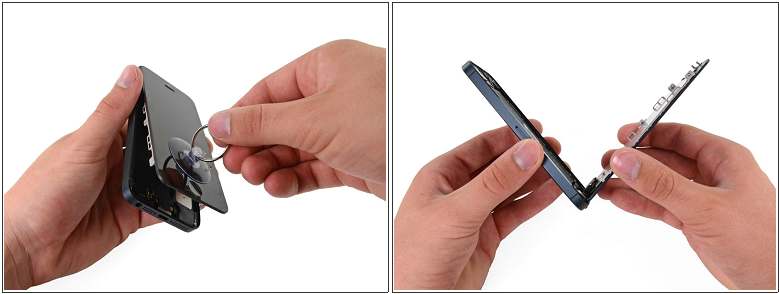
Warning! Don’t try and remove the screen yet! As metioned before there are still cables attached.
It is advised to disconnect the battery at this point.
Lift the screen up to about 90 degrees to gain access to disconnect the cables.
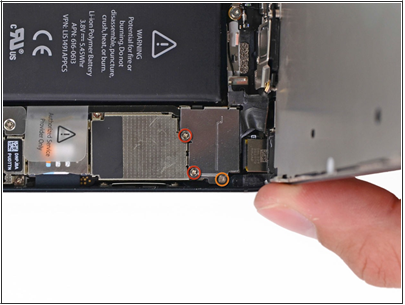
Remove the screws highlighted in the picture.

Take off the bracket protecting the cable clips, there are small hooks on the brackets be sure to lower towards the outside of the phone.

Using the plastic tool remove the following clips from the logic board.Take the screen away from the phone.

Take the screen away from the phone.

On the back of the screen you now have to remove the two screws encasing the front facing camera.

Be sure that the black plastic spacer below the metal bracket you have just taken off is not lost. The top screw from the bracket goes through this.

Now take away the earpiece speak from the iPhone.
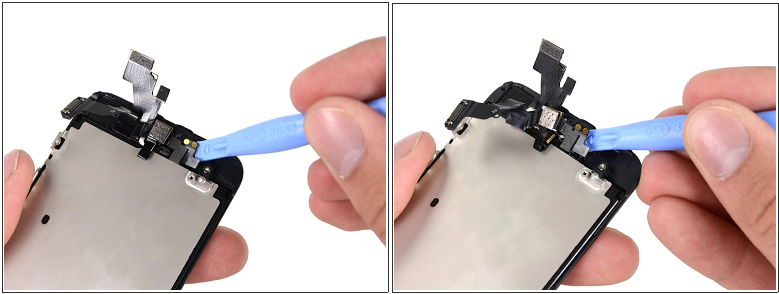
Warning this step requires patience’s and a steady hand as the contacts from the earpiece speaker are glued down. Using a plastic tool slowly tease the contact away from the phone. They are very easy tear if you do tear it you can buy another one off eBay for about £5.
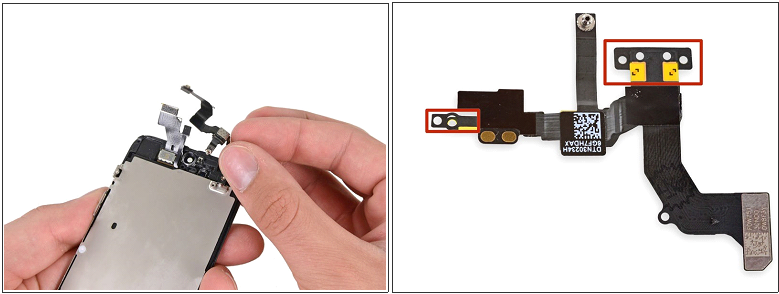
Take off the front-facing camera and rear microphone
Be sure that the square small metal and plastic holder for the proximity sensor
there is a small, square plastic and metal holder for the proximity sensor.
When replacing the sensor or camera be sure that the holder remains stuck to the display.
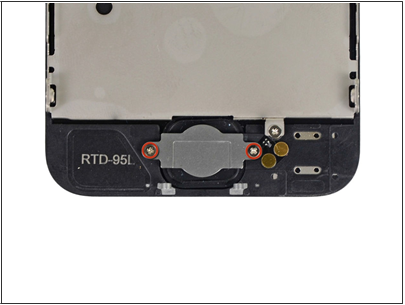
Next take the two screws out from the back of the home button.
Warning to avoid damage, when reassembling the home button do not tighten the screws too much as this can case damage to the home button.
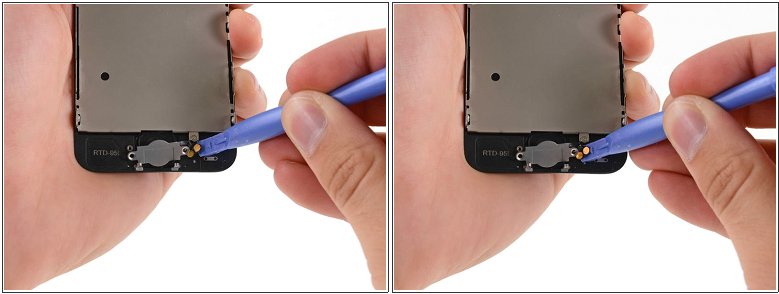
Using the plastic tool, pry the home button cable up from the back of the screen. This is glued down and may need teasing be sure not to apply to much pressure.
Start at the two gold contact points and pry it up to the left slowly.
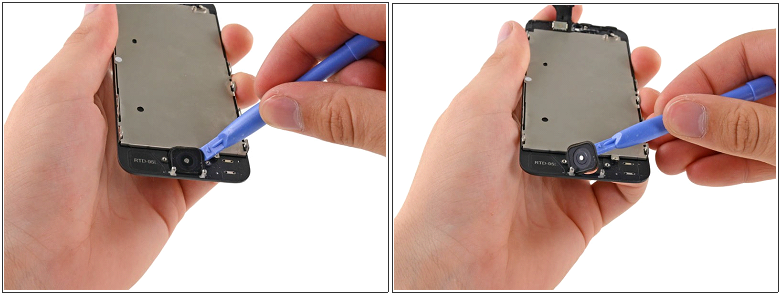
Use the plastic tool to get the home button up from the display.
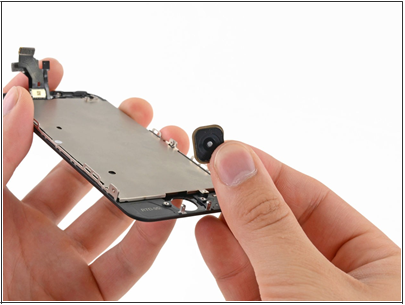
Take the home button away from the screen.
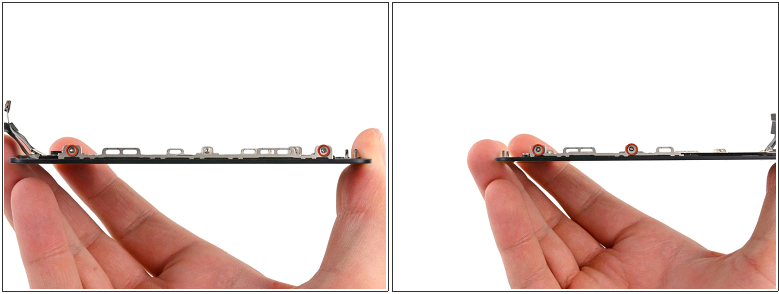
Remove two 2 mm Phillips screws from each side of the LCD frame (four total).
Take the two screws off from each side of the screen. Total of four.
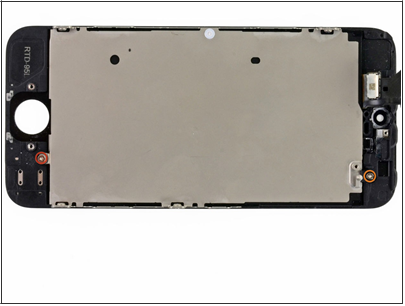
Take the two screws that secure the LCD screen out from the back of the assembly.
Be sure to remember where the screws are from as they are both different sizes.
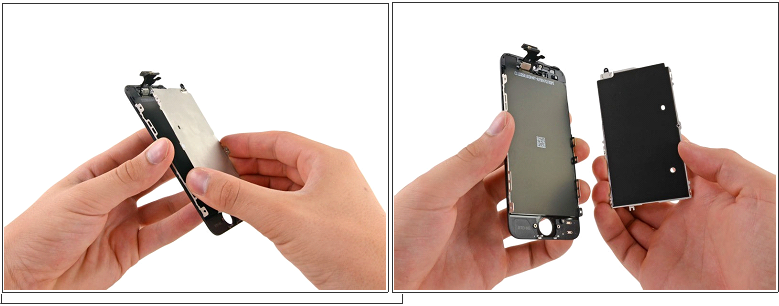
Take off the metal LCD plate.
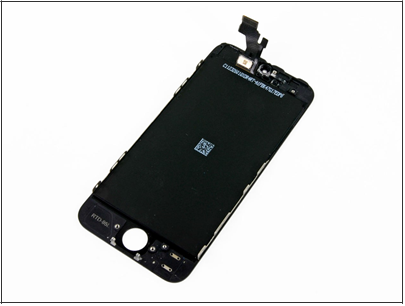
All that is left now is the LCD screen.
Be sure to use any parts that you have taken off the old screen on the new LCD which include: -
Earpiece speaker, Home Button , Front facing camera lens bezel, Front facing camera and LCD shield.
Well done you have successfully taken you phone apart! Now just follow the instructions again in reverse with the new screen to put it back together. Any questions please leave a comment and I will try to answer as soon as possiable.


